
How I Got My Kenyan Passport in TEN DAYS: A Step-By-Step Guide
- Jul 1, 2025
- 6 min read
As a girl who now loves to travel and lowkey manifests future trips within the four walls of her bedroom😉, I had to start putting action behind my faith by taking practical steps and equipping myself with the tools I’d need to travel. That began with obtaining my passport. This blog post will serve as a step-by-step guide for that young African girlie who dreams of travel or just wants to have a passport, because why not?
I will start by saying, Government Offices used to give me anxiety in the past, hence why I dragged my feet to obtain my passport. I was always guaranteed to encounter something that made me anxious, someone who was rude, or being asked to provide a bribe, aka, ‘kachai’ However, things have changed since the last time I had to go to a government office, because applying for a Kenyan passport was...easy. This is how I went about it, and how you can too.
STEP 1: Review the Requirements
Before you start the application process, you want to make sure that you have everything that will be needed for a successful application. When you research the application requirements on Google, you will be provided with the list, plus the application fee depending on the number of pages that your passport will have. The images below display the list of requirements and the fees. Ensure you have scanned copies.

💡Points to note on the requirements;
✅You don't need the recommender's ID copy anymore.
✅You will receive the payment receipts at the end of the application once you pay the fee.
The passport fees will be paid at the end of the application via an M-PESA prompt sent to your number. Therefore, ensure you have enough money in your account to make the payment.

STEP 2: Visit the E-Citizen Website and Open an Account
In case you don’t have an e-citizen account, you’ll need to open one. The E-Citizen portal is an online portal whereby one can obtain government services, such as passport applications, good conduct certificate applications, and more.
Visit the site via this link E-Citizen Website, select 'Apply for a Passport'.
You will be taken to the login page, where you'll log in if you already have an E-Citizen account, or sign up for one.

Once you log in, you will be directed to this page, where you will fill in all of your information. Ensure you have all your documents handy for ease.
I will provide screenshots for each page, so that you can know what to expect and how to correctly fill in the details.
Category
Select Your Application, since you are applying for your passport.

Adult Application Instructions
This page contains more information about your application, such as how long it would take, the document requirements and the passport fees.


3. Dual Nationality
Assuming you are a citizen of another country, you'll have to input the passport number of the country you are a citizen of. Otherwise, select 'No' and click 'Next'.

4. Passport Type
Here, you will select 'Ordinary', then 'First Time Passport', then specify the no. of pages you'd like your passport to have. Refer to the image of the passport fees above to see the prices of each passport type. The more the pages, the higher the fee.

5. Applicant Details
The next section is your Applicant Details. You will fill in details like your name, place of birth, and residential details.

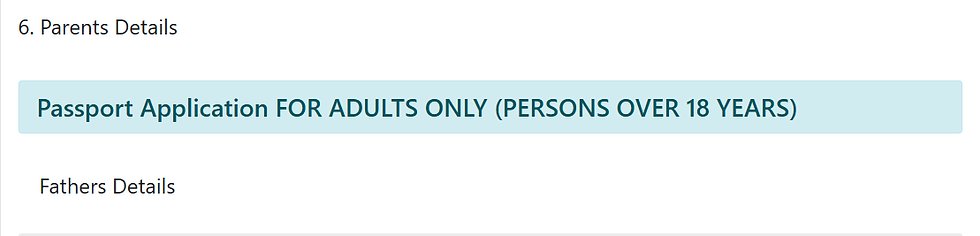
6. Parents' Details
In this section, fill in your parents' details. You will need details from their IDs to fill it in accurately. However, you have the option of selecting their details as unavailable, and you won't need to fill them.
7. Next of Kin
You will then need to fill in the details of two individuals as your next of kin. Your next of kin can be your closest relative. This will be someone legally obligated to make decisions on your behalf in case you are unable to. So, choose wisely. In this section, you'll also need to fill in their details as per their ID.

8. Particulars of Children
In the next section, you will need to fill in details of your children, if you have any. I'm not sure of the purpose behind this, but since it's just me, I selected no. :)

9. Uploads
The last section will involve uploading a copy of some of your documents as indicated in the picture below. I had a tough time uploading these documents as it has a size limit. I had to compress the documents and convert them to jpg. version so that they would go through. You can use IlovePDF.com to both compress and convert your documents. So, please keep this in mind.

After clicking preview, you will get to review your application, then select 'complete'.
STEP 3: Making The Payment & Booking The Appointment
After selecting 'complete', you will be directed to the payment page, where you'll select your mode of payment amongst MPESA, Airtel Money, your bank card, or a particular bank.
After the payment goes through, you will get to book your appointment. The appointment is for you to get your biometrics, to have your passport processed, hence the need to show up in person.
You will obtain a form that has all the details that you just filled out online. You'll need to print this and carry a physical copy with you, plus the documents listed under the requirements for submission.
If you're in Nairobi, the most likely available place of appointment is Nyayo House, in the Nairobi CBD.

STEP 4: What Happens On Appointment Day?
Ensuring you've carried the form, plus all the documents required for submission, you will show up to the appointment at the time you booked. I recommend booking the earliest time, as you'll find shorter queues and faster services.
If you're not sure of where to go, there will be security people there to direct you. Also, if you happen to have forgotten to print something, there are cybers nearby for you to do that.
Now that you've arrived, you will make a queue from outside (don't worry, it moves quite fast), you'll then show the security guard the government copy of the receipt of payment, as it has details of the appointment. They will only let you in if you show this.
You will follow the queue until you reach the officer, who will review your documents. You will then be directed to a room where they'll take your biometrics (a picture of you and your fingerprints).
After this, you will be given a waiting sheet and will wait until your passport is ready.
The Immigration will send you a text notification informing you that your application has been received and is being processed.

Now, you wait! My passport took exactly ten days. When it is ready, you will be notified via text.

To collect your passport, you may show up on any day, Monday-Friday, 8 am-5 pm, at the place you submitted your documents and had your biometrics taken. Ensure you show up with your original ID and the waiting sheet they gave you when you made your application.
This part also did not take as long. I was directed to the place where passports were being collected. I gave my waiting sheet and waited till my name was called. I then walked into the office and collected my passport.
Congratulations, now you are a global citizen!
A passport is not just an official document; it is a gateway that gives you access to opportunities worldwide. Allow your mind to explore all the possibilities before your feet; whether for work or travel, now you can go anywhere!
Also, props to the Kenyan government (even though I'm not a big fan rn🙄) for streamlining the process. I am living proof that at least this part of the system works. Most of us refrain from taking this step because of the horror stories we've heard, but as you can see, it works.
So, if you've been thinking of getting a passport, this is your sign to go for it!
I have more content on travel coming up, the not-so-glamorous but necessary procedures you need to follow if you want to travel. In the next post, I'll share my experience of applying for a Schengen Visa to travel to the Netherlands!
Till next post,
Miss Kambe.


Comments